
Reference: http://audacity.sourceforge.net/help/faq?s=install&item=lame-mp3
Our goal is to extract only desired content from a larger audio file and save it all into a smaller audio clip. Let's say we desire audio content that is concerned with a single topic, in this case, who is at fault when a bicyclist collides with a car door:
The soundtrack to the video above is a clip that actually consists of two segments. Each segment consists of multiple smaller pieces. The first of two segments involves a caller named Sunny, the second a caller named Jim. Each segment is comprised of pieces that were first selected, roughly around two predetermined times denoting beginning and end, then copied into a new work area, where they were then sculpted (i.e., extraneous slices removed). Finally the pieces were ready to be set aside, each prepared for the task of joining into a segment. The segments were then merged into a clip, following the same process.
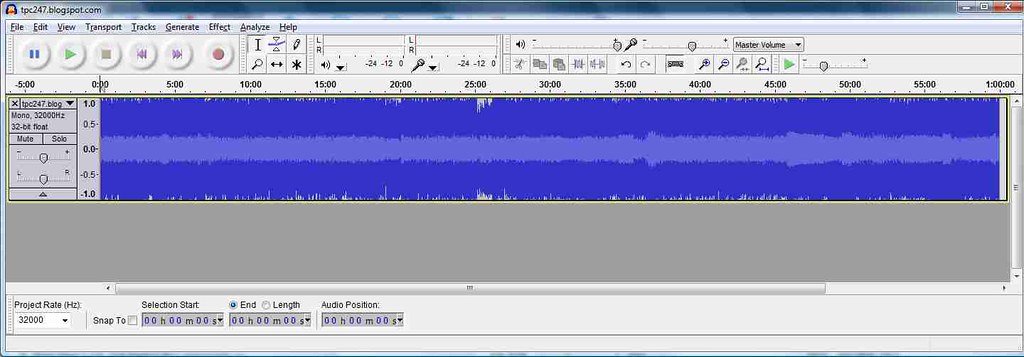
Here we begin with an hour-long audio file recently imported into Audacity:
At this point I should note during this tutorial there will be prodigious use within Audacity of:
- the keyboard space bar
- the mouse left button
To edit the audio content, we first make the rough cuts, then the fine cuts. When you've become well-practiced with Audacity, after this tutorial, you can skip the rough cuts, and use the zoom feature to make fine cuts from, say, an hour-long audio file. For now, since we're just getting acquainted with Audacity, we don't want to overwhelm the new user with zooming in & out and dragging the mouse across multiple views of the audio file.
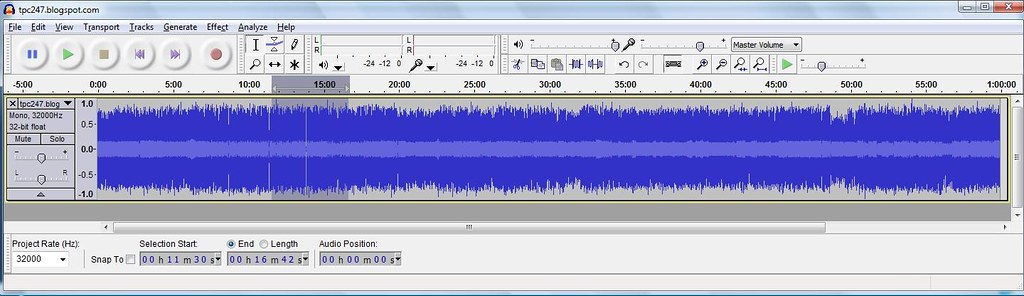
Let's say that, from what my eyes and ears perceive, the first piece of our Sunny segment is from 11:32 to 16:39. Once you've identified the approximate beginning and stop points, the rough boundaries, train your eyes on the "Selection Start" and "End" boxes next to 'Audio Position':
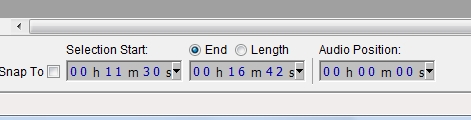
Note that if you click on the 'Length' radio button, the 'Selection End' box becomes a 'Length of Selection' box. As luck would have it, my mouse landed just 2 seconds before the estimated beginning of our desired content, and we make sure to end our selection on or slightly after what our ears had earlier perceived to be the stop of the track. Now that we have our first rough piece of our desired content segment, our next step involves using the analogy of finding a clean table or workspace to put our pieces of desired content for the purposes of sculpture and assembly into a single segment. Click on File/New and open a brand new Audacity window (for you users of audio editing software Soundforge, this is akin to creating a new stage). Now paste your copied audio content into the empty window. Notice that since the audio content in question is much shorter than an hour, you can easily select the slices you want to throw away, and delete them.
To wrap up this tutorial's editing portion, repeat the following steps for the other pieces of the segments:
- Open your audio content file and play it
- Note to yourself, or better yet, write down the start and end boundaries of your desired piece of content. Be ready with a pen and piece of paper to record where the start and stop points are.
- Click on File/New to create an Audacity window that you have purposed for sculpting and joining pieces of a segment
- Select, from the primary Audacity window, the rough piece of desired content; it's ok if you're off by a few seconds. Paste the copied content into the new Audacity window.
- Carefully sculpt the rough piece. Remove extraneous slices, such as dead air and fragments of unwanted content.
- Select the second file by clicking on its label (the area around the mute/solo buttons).
- Choose “Find Zero Crossings” from the Edit menu.
- Choose “Cut” from the Edit menu.
- Place the cursor by clicking in the first track, after the end of the audio.
- Choose “Paste” from the Edit menu.
At some point you might select some content in your audio file, and see now you're not able to cut, copy, paste or delete:
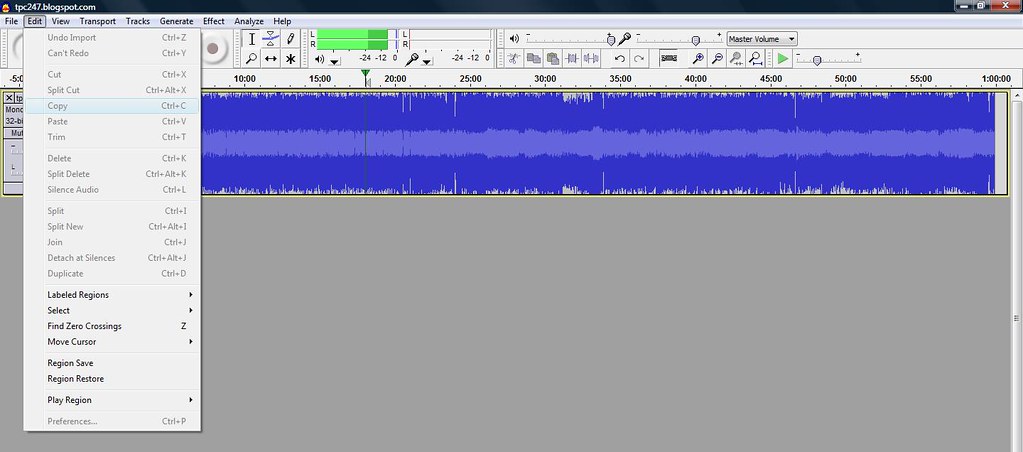
You notice the edit toolbar is not functional and will say "I'm not able to edit" or "Audacity won't let me edit", and ask "is the edit toolbar not enabled ?", "why can't I edit ?", or "how do I enable the edit toolbar ?". All good questions, seeing as how the options are grayed out, so you're unable to edit your audio file. There's a simple solution: make sure the playback is stopped.
Now that you have an audio file containing only what you want and need, you may like to know how to host and serve your audio files on Youtube.

No comments:
Post a Comment