
 |  |
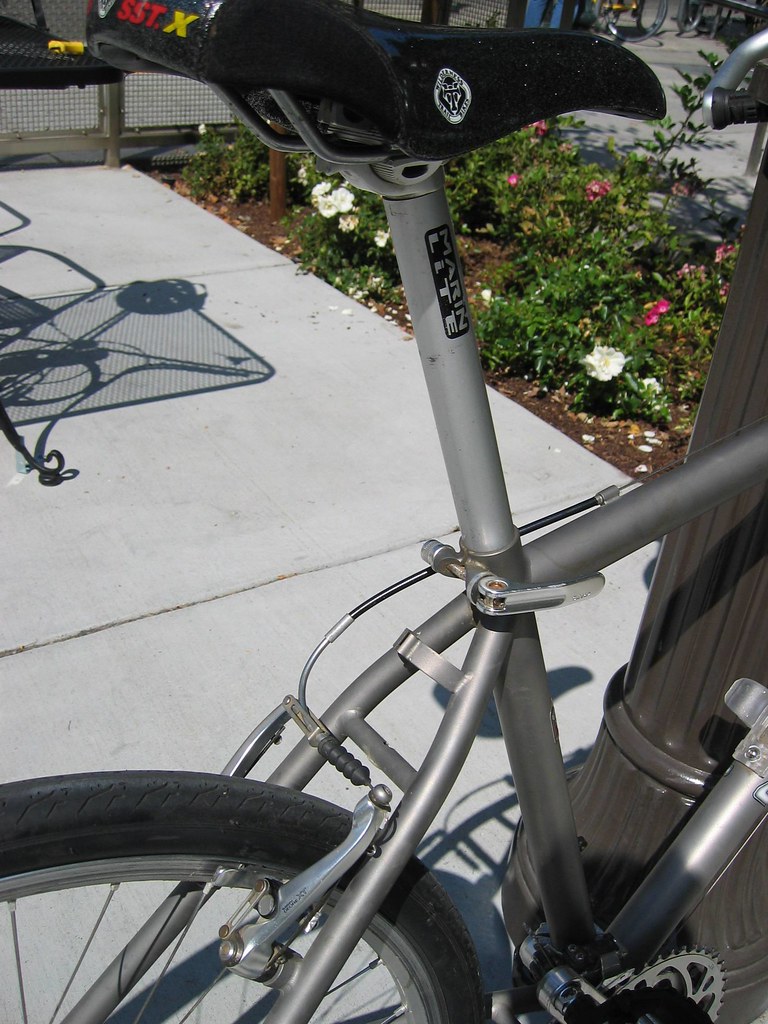
| a tempting target for a would-be thief | Foiled again! Thanks seat leash |
Were anyone to happen upon this scene, look around and see no one watching, the thought might cross your mind to simply loosen the quick release and walk off with someone else's property like it was yours. The Great Recession created lean and mean times, changing the way Americans spend. With such general apprehension and fear, you can find some amazing bargains in the bicycle market right now. I decided to overcome my reluctance to spend and make the big purchase that, as an avid bicyclist, you might be saving for as well. My new second-hand bicycle is a lightly used 1997 Marin Team Titanium that has a quick release binder bolt for adjusting the height of the seat post.
Let's start by getting our vocabulary straight (thanks to Sheldon Brown for helping me put names to bike parts):
- saddle (also called bicycle seat)
- saddle clamp (also called seat sandwich)
- seat leash (also seat security cable)
- seatpost or seat post (also called seat mast, seat pillar, or seat pin)
- stolen (also pilfered, nicked, or made off with)
- Y hex wrench (also 3 way hex wrench. This is a tool, commonly seen in bike repair shops, that has the 3 wrench sizes to fit the socket heads on most modern bicycles. 'Hex wrench' can be used interchangeably with Allen wrench or L wrench)
http://www.sheldonbrown.com/gloss_sa-o.html
http://en.wikipedia.org/wiki/Allen_wrench
To prevent your seatpost and saddle from being stolen, you will need:
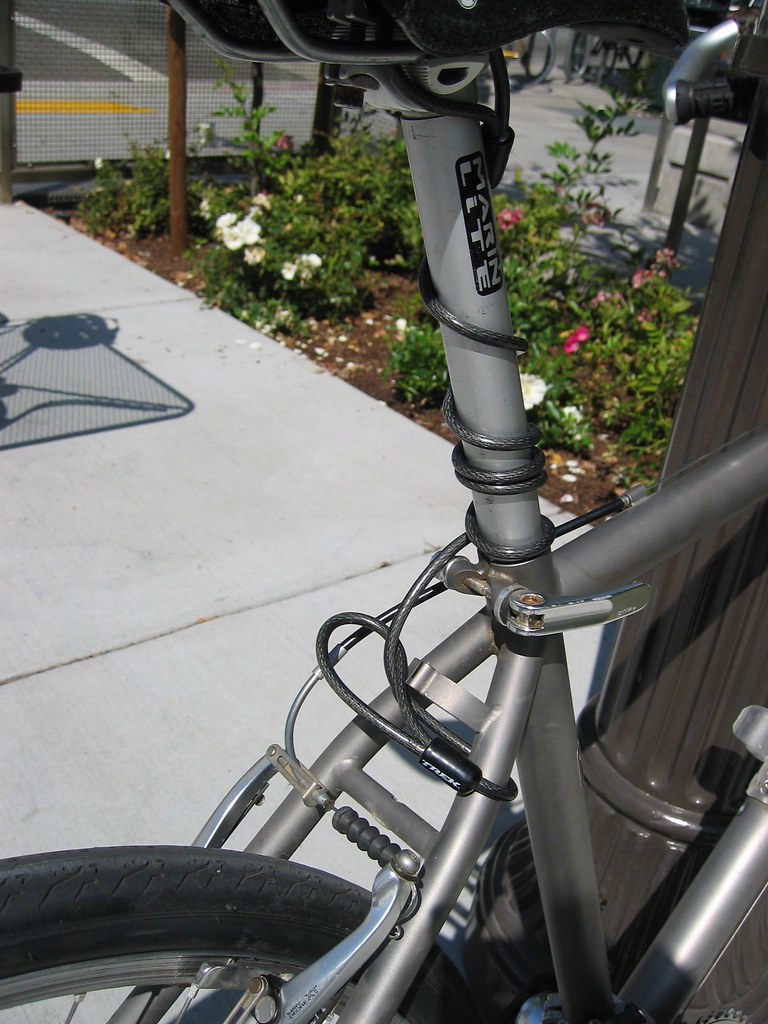
I tried numerous times to figure out a way to use a seat leash to secure my bicycle seat and seat-post, but the closest I got was a half-baked solution where I added the end-loop as an ingredient into the seat clamp mechanism, so that the clamp was gripping a combination of saddle rail and seat leash loop. This made for not the best grip on the saddle rails, and, while you were riding, the bicycle seat was prone to moving horizontally back and forth, a rather unpleasant event for any rider. The light bulb flashed atop my head last Sunday, September 6, at around 11:25am, when I stepped into the Missing Link repair shop and spoke with Andy Renteria, who told me it's possible to secure the saddle and seatpost to the bike with a security cable. He used his forefinger and thumb as an analog for the end-point loop of the seat security cable, and wrapped it around the saddle clamp, between the seatpost and the saddle rail. The breakthrough for me on how to secure your bike seat was using the saddle clamp itself as the focal point on which to anchor the endpoint loop:
Thanks Andy, at Missing Link repair shop
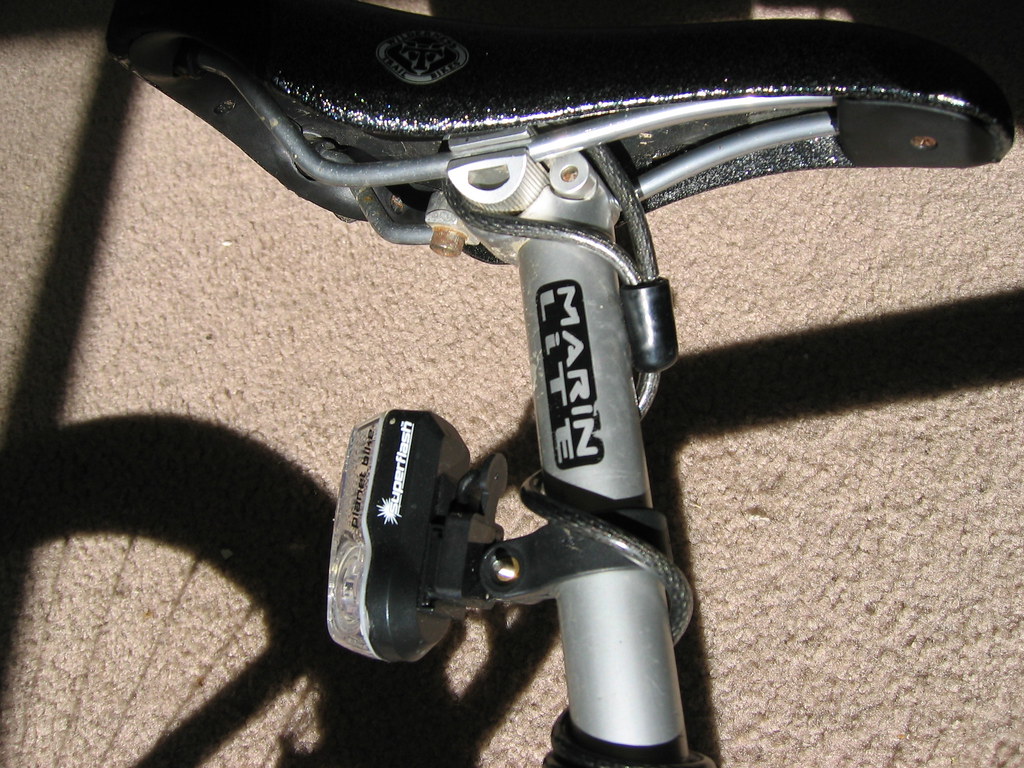
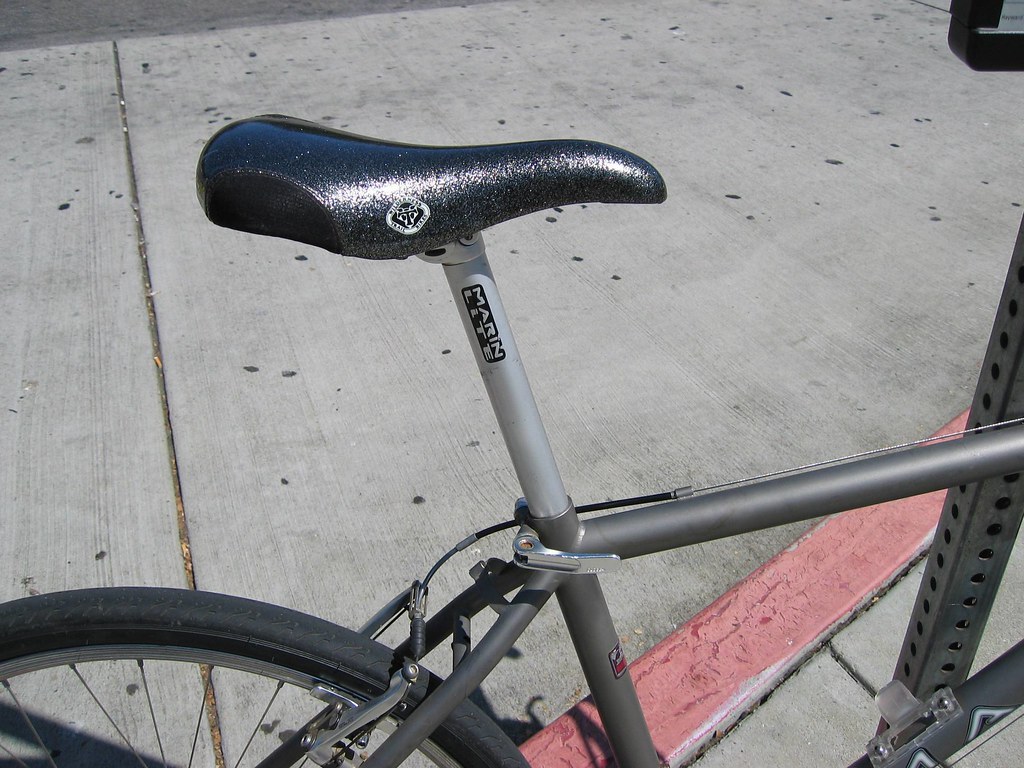
The seat security cable has end loop which uses the saddle clamp (I call it a seat sandwich) as a focal point. Also in the picture is my beloved Planet Bike Superflash Stealth Tail Rear Light
From start to finish:
- use the Y hex wrench, or any appropriate Allen or 'L' wrench, to remove the saddle
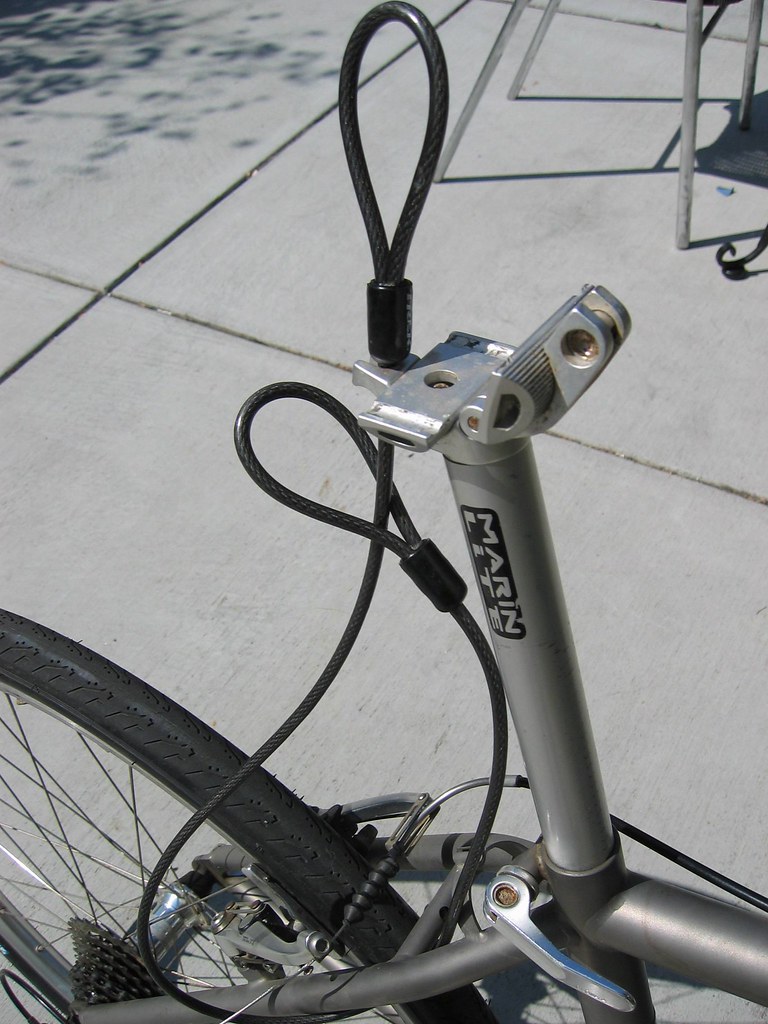
- insert one loop through the other and wrap your seat security cable around the seat stay, or any focal point that has stops and forms a closed area. Take care when wrapping your security cable around the seat stay that you avoid the part of the frame closest to the tire
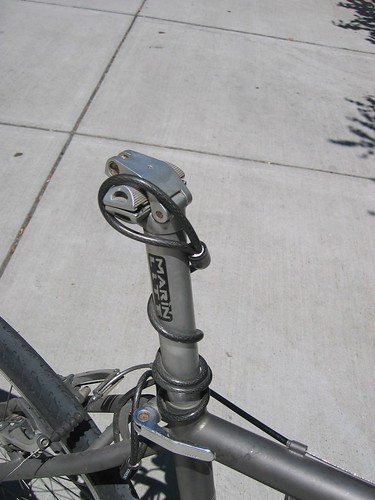
- with the remainder of the bike security cable in your hands, visualize the saddle clamp itself as the focal point on which to anchor the endpoint loop, and affix said loop on the clamp
- now install (or rather, reinstall) the saddle into the seat clamp mechanism, making sure the seat leash end-point loop is between, and stopped by, the seat rail and the seat post.

how did you attach the cable to the saddle's rail? i'm really confused.
ReplyDeletehi, thanks for your interest in my blog post. I've updated the article with a new photo. Hopefully that may clear things up and be of help to you.
ReplyDeletenot the best instructions my friend -- they key instruction is visually unclear.....with the picture......
ReplyDeleteshow a pic with the 'sandwich open and how the leash is positioned then and thus how it will finally sit.....
I understood stupidly the leash was sandwiched into the clamp......
yet i figured it out eventually.......
actually, I found this super helpful. Thanks!
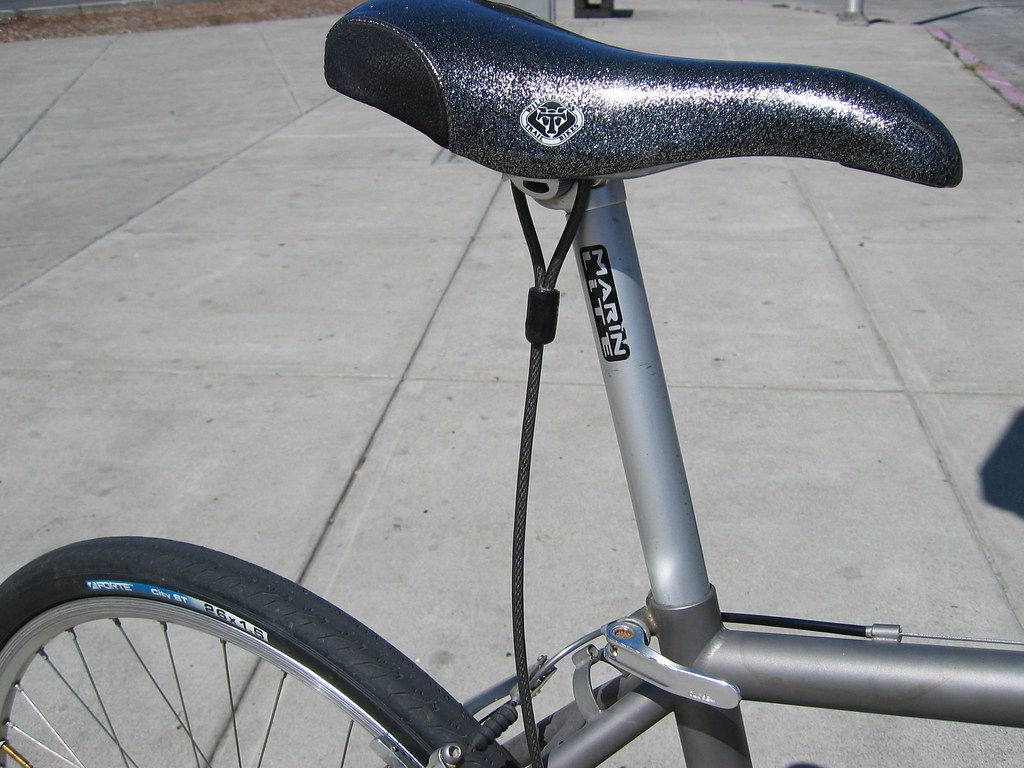
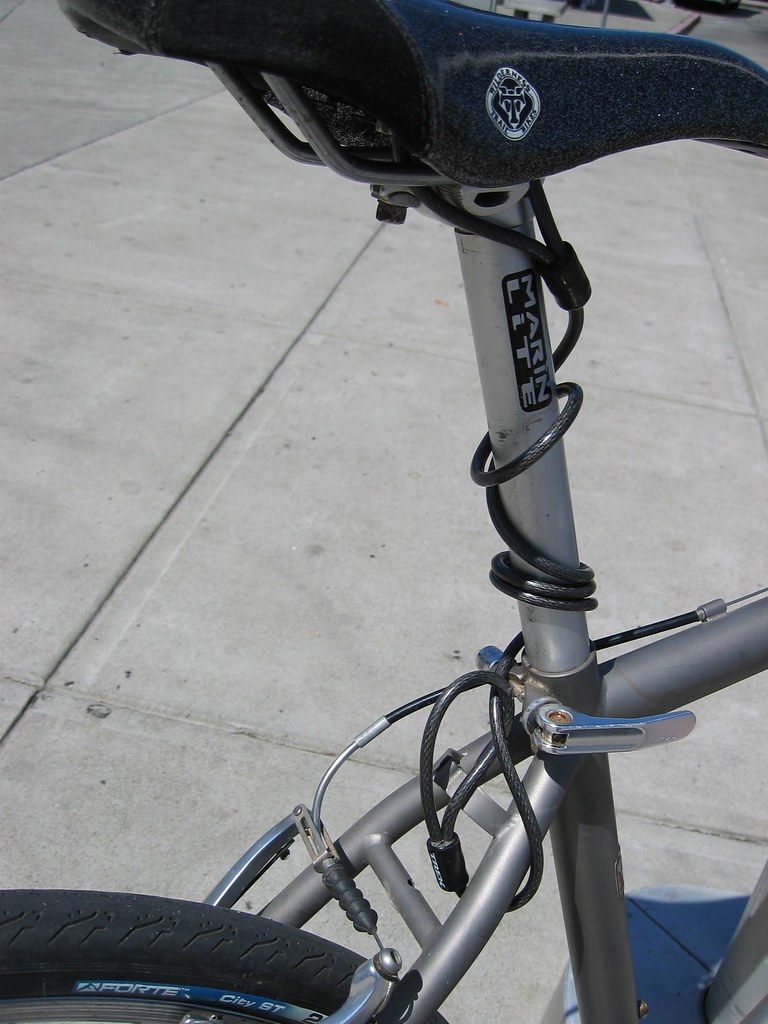
ReplyDeleteI've updated the blog post with a new photo clearly showing the end loop of the seat leash around the entire seat sandwich, for those of you who mistakenly assumed (as I once did) the end loop was sandwiched into the clamp. Thanks for the suggestion.
ReplyDeleteI don't understand. Wouldn't it be simpler to replace the quick release mechanism with a regular bolt and nut?
ReplyDeleteWhen your saddle costs over $100 and your seatpost is worth another $40-50 replacing the bolt AND putting a leash on the saddle is a great idea. Spend $10, save money and aggravation.
DeleteThanks for the help... Makes sense to me.
ReplyDeleteI understand (and can see in the photos) how this post suggests installing the cable -- but I do NOT see how this in any way prevents a thief from stealing the seat and seatpost. It would slow them down, certainly, and might be just enough complication, or appearance of security, to make the thief move on to some other bike. Which is worth doing, but not the same as truly locking the seat.
ReplyDelete